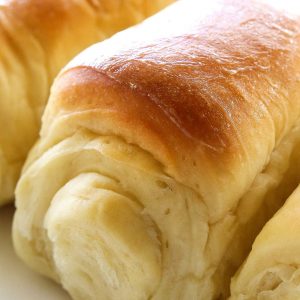
Lion House Rolls
Lion House Rolls are known around the world for their incredible texture and flavor. I've made this Lion House dinner roll recipe so many times that I've learned some tricks that I will share with you in the directions. Great for Thanksgiving, Easter, or any occasion.
Ingredients
- 2 cups warm water
- 2/3 cup instant nonfat dry milk, (like Nido or Nestle)
- 2 Tablespoons active dry yeast
- 1/4 cup sugar
- 2 teaspoons salt
- 1/3 cup butter, softened (5 1/3 tablespoons - plus more for brushing the rolls after baking.)
- 1 large egg
- 5 to 5 1/2 cups all-purpose flour, (bread flour can be used if you have it on hand and will make for a lighter roll)
Instructions
- In the large bowl of an electric mixer or in a separate glass bowl, combine the water and the milk powder and stir so the milk dissolves.
- Add the yeast to this mixture while water and milk are still warm. Add a pinch of sugar to help the yeast proof. Let the yeast proof (dissolve and start to react) for a couple of minutes. It helps to cover it with a towel to get it to proof. It should look foamy (see Notes for more information).
- Next, add the sugar, salt, butter, egg and 2 cups of the flour. Mix on low speed of mixer until ingredients are wet, then turn to medium speed and mix for 2 minutes. Stop the mixer and add 3 more cups of flour (now 5 cups total added so far) then mix on low speed until the ingredients are wet, then turn mixer on medium speed and mix for 2 minutes to knead. The dough will be getting stiffer.
- Add up to 1/2 cup of flour. You might not need to add it all just slowly add it until the dough starts to pull away from the sides of the bowl if using a mixer. This can be done by hand as well. The dough should be soft, not overly sticky, and not too stiff. Scrape the dough off the sides of the bowl and pour approximately on tablespoon of vegetable oil all around the sides of the bowl. Turn the dough over in the bowl so it is covered with the oil. This helps prevent the dough from drying out. Cover with a kitchen towel or plastic wrap and allow to rise in a warm place until double in size (about an hour).
- Sprinkle a cutting board or counter with flour and put the dough on the flour. You want to put enough flour on the dough so that it is workable and not sticky.
- You can roll these into crescent rolls or do it the traditional Lion House way. For the Lion House way: Divide dough into two equal portions. Roll each portion into a rectangle about 11X14 inches and about 1/4 inch thick and brush with melted butter. I probably use 1/4 cup melted butter brushed on here.
- You then want to cut the rectangle into smaller rectangles that are 2"X4" (a little smaller than a dollar bill). If you make and "L" with your thumb and pointer finger that will show you how wide and tall to cut your rectangles. See the video above for clarification.
- Then you roll them into the Lion House shape which is rolled with the tail of the roll touching the baking sheet (see pictures above) and place them on a greased (or parchment lined) baking pans with the end of the roll resting on the pan. Cover again with a kitchen towel so they don't dry out as they rise. Let rise in a warm place until the rolls are double in size (approx. 1-1 1/2 hours).
- Bake in a 375-degree oven for 15-20 minutes or until they are lightly browned. This definitely depends on the size of your rolls. Brush with melted salted butter while hot. Yields 2 to 2 1/2 dozen rolls.
Video
Notes
This recipe calls for active dry yeast but you can also use instant yeast. You don't need to proof the yeast in water. Just add the yeast and the water together in the recipe and continue on.
WHAT TEMPERATURE SHOULD THE WATER BE FOR THE YEAST TO RISE?
The most common mistake when working with yeast is getting the water temperature right. If your water is too cold the yeast won't activate. If it's too hot it will kill the yeast. Technically the water temperature should be around 116 degrees F. Most people don't measure the temperature.
Think of the temperature of water if you were to bath a baby. You would want it to be warm enough but not hot.
How do you know if it worked? If your yeast proofs correctly it should look all foamy. I've noticed it helps to cover the bowl with a towel while it's proofing. If it's not foaming, your yeast is not activated or you killed it. Start over before wasting your ingredients on the rest of the rolls.
Note: You can freeze shaped rolls for later use. After the first rise, shape the rolls but do not rise again. Instead, place rolls on a baking sheet and immediately place in freezer. When dough is frozen solid, remove rolls from pan and place in a plastic bag, squeeze excess air out of bag and seal. Rolls can be frozen for 3 weeks. To bake after freezing, let rolls rise in a warm place until doubled. This could take up to 2 hours since they are frozen. Bake as directed.
I've noticed that if you let the rolls rise too long after they been shaped their texture gets porous and not as good so be careful of that.
Source: KSL.com and the Lion House Cookbook
CAN I FREEZE THESE ROLLS?
Yes. You can freeze shaped rolls for later use. After the first rise, shape the rolls but do not rise again. Instead, place rolls on a baking sheet and immediately place in freezer. When dough is frozen solid, remove rolls from pan and place in a plastic bag, squeeze excess air out of bag and seal. Rolls can be frozen for 3 weeks.Serving: 1grams